20 August 2011

The Great Batmobile Blog Build Off WEEK 3!

This week, all the boys here at the Flying Batmobile Ranch were put to work to get a major milestone accomplished: Getting the main body built with the windscreen cut out.

Try this, Cooper!
Last week, we started shaping the rear end of the body, using a larger-sized plastic egg.  After the second try, the best fit was actually from the top, leading half of the egg shape.

Having the chassis built allow us to realize that one egg would not be sufficient to cover the length of the car.  The next step was to find an intermediary piece of plastic for the mid-body.


Easter-mobile!


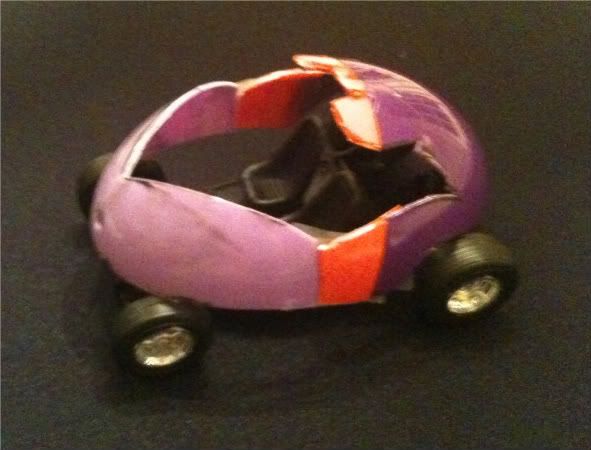
Turns out, the base of the egg was actually the best idea.  As you can see, the base (in orange) allowed for a perfect replication of the over shape of the mid body.  The tapered half of a third egg then was used to create the front end of the body.

After connecting the pieces with tape, the bat shape was drawn onto the plastic and cut out with industrial sheers.  The edges will need finishing and cleaning.
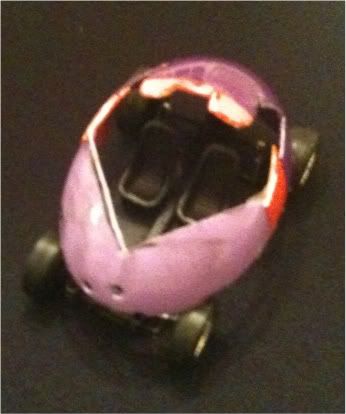


Stage I body work

The completion of the body shape made me focus on how the chassis and body integrated, which led me to conclude that the chassis needed modification before moving on.  The rear axle needs to be widened slightly.  Significantly, the front axle should be as wide as the rear, and the fat rear tires need to be replicated for the front end.

Obviously, the body requires the front axle slots to be cut.  My thought was to get the chassis set first and then figure out where to cut the body.

Remember old chum:

  Measure twice,
  Batusi once.

14 August 2011

The Great Batmobile Blog Build Off WEEK 2!

Revell's Dune Buggy chassis
It's our second week of the Frank Quitely Batmobile Blog Build off with The History of the Batmobile website and we're starting with the chassis assembly.

Again, my idea is to start with a platform and build up, fabricating most if not all of the body.

I had ordered full moon hubcaps, but when they arrived I found out that they are too large to sit into the wheel.  I will have to trim them down so that they go into the wheel base.


Engine canopy Phase I
The week was a great deal of trial and error, using a variety of plaster easter eggs to get the general shape of the body.  I finally found one that made me happy.  Ironically, it's the top half of a plastic egg!

I will create a scaffolding for it out of styrene tubing and tenax.  I need to go digging for several nozzles to make the jet engines.


Rear view phase I
At this point, I'm not sure if I will use the original floor pan.  Based on the diameter of the egg, it will need to be extended.  Certainly, I would extend the axle as well.  I will wait until I fabricate the rear fenders and dorsal fins to make that decision.

The nicest surprise of the week was an email from a reader from the UK.  The Eaglemoss company has made a small replica of this Batmobile and James S. sent me a picture of the blueprint!  I think I know what I want for Christmas!


 The blueprint and photos are supercool and super helpful.  Thanks, James!


Eaglemoss Batmobile blueprint
Tune in next week,

Same Bat Time,

Same Bat Blog!


04 August 2011

The Great Batmobile Blog Build Off!

My 'net buddy Spencer1984 hosts the amazing Batmobile History website, THE definitive reference for all of the Dark Knight's many cars. We share the passion of fabricating the many Batmobiles that never made it in 1/25 model scale.  Would decided to have a celebration of all things Batmobile with a blog build off!

The decision was to build the Batmobile from Grant Morrison and Frank Quitely's amazing BATMAN AND ROBIN!  Sure, it helps that it flies, but it's a very fresh approach to the design.

Batman & Robin vol 1 (2010)
Frank tossed out most conventions and showed us a grey and red car.  It works:

Sketchbook of Frank Quitely (2010)
Plus, this baby flies!

Sketchbook of Frank Quitely (2010)
I think it's a wonderful look and makes me think of Science Ninja Team Gatchaman.  It also makes me think California and the Meyers Manx:


I grabbed the Revell dune buggy kit off the net and started with the chassis and interior.  I like the wheel base and plan on keeping it.

I'm using the fenders as an approximate for the Quitely sculpt.  If at all possible, I would like to keep some of the original styrene as the under structure for the new fenders.  The dorsal fins will be fabricated from sheet styrene.  Ahh, that damn bubble canopy?  That's a whole 'nother story...

Full moon headers on ordered and on their way so that we can build up the basics.  

It's time to break out the curves!

Same Bat Time,

Same Bat Blog!